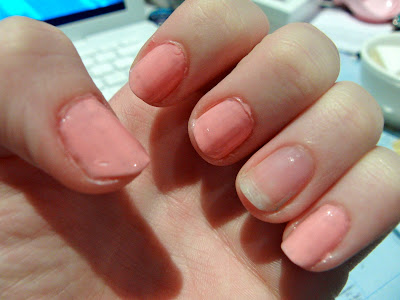
Happy Mother's Day to all you lovely mother's out there! Each year, my mother and I have a tradition of participating in the Mother's Day Classic charity walk/run to raise money for breast cancer. We participated this morning in fact, and Melbourne put one of it's finest weather shows, complete with persistent rain and freezing temperatures, but it was fun none the less, at there's always a great atmosphere at the Mother's Day Classic.
Pink being the colour of breast cancer awareness and the pink ribbon being the symbol, I thought I'd do a themed manicure for the classic this year, but it's also just a pretty basic pink ombre for any occasion. This is a pretty straight forward tutorial as I'm certainly no expert nail artist myself, but hopefully it might give someone some nail inspiration, if nothing else. I must also apologise for the bad lighting and quality of some of the photos as I had very limited time to put this together...I should also apologise for the horrible, tatty state of my fingers and nails... But on with the show!
You will need:
A range of pink nail polish colours, from a pale pink to dark/hot pink, with probably 1-2 shades in between.
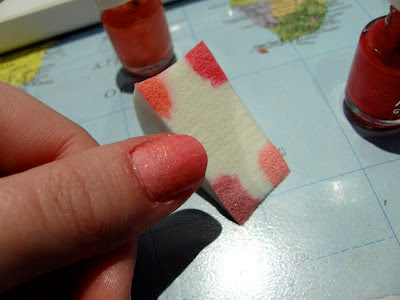
A make-up sponge
A nail-art pen (although you could just as easily use a toothpick or small paintbrush).
I don't have the biggest range of nail polishes to work with, and I'm not a huge pink person (these are some I was given years ago), so my pink shades ended up being pale pink, a more pale plum sort of colour, coral and hot pink, which probably wasn't the best combination for creating a really gradual, nuanced ombre, but you have to work with what you've got!
Step 2: Sponge some of your second shade about a quarter of the way up your nail. I find it works best to sponge back and forth between the two colours you're blending a few times, so you don't end up with a really obvious line between the colours. Then, sponge on your third shade about halfway up the nail, followed by the forth shade, on the tip, making sure the blend in between.
(Unfortunately, I hadn't allowed the nail-art pen to dry quite enough before I put the topcoat on, which explains the little crack in the design).
As I said, you could definitely get a much nicer ombre effect with a better range of pink than the ones I had to work with, although I think the coral added a great, intense brightness amongst the pinks. Let me know if you try this, or have any other, similar designs to share, I'm becoming a bit obsessed with nail-art and love finding new ideas!
Hope all the mothers out there are having a swell day!


No comments:
Post a Comment