Showing posts with label nail art. Show all posts

Tuesday, May 27, 2014

Funky Nails!


I did some bright, funky, experimental nails this week. Alas, they are far more wobbly on my left hand of course.


I used Bloom 'Miss Connie 1' for the base colour and a Sally Hansen nail art pen for the lines. Have you done any funky new nail art recently? 

Thursday, February 14, 2013

Little Things Thursday

5 things that have brightened my week a little...
1. I love this gorgeous Moonrise Kingdom print by Roland the Illustrator (available on Society6). I cannot get enough of Moonrise Kingdom, it's such a quirky, visual feast. 

2. This article with photos of 30 of the most beautiful abandoned places truly made my head spin and my inner explorer very overexcited. 

3. Confetti manicure - this is one of the most pretty, quirky and clever manicures that I've seen in a very long time, thanks to the the Beauty Department.


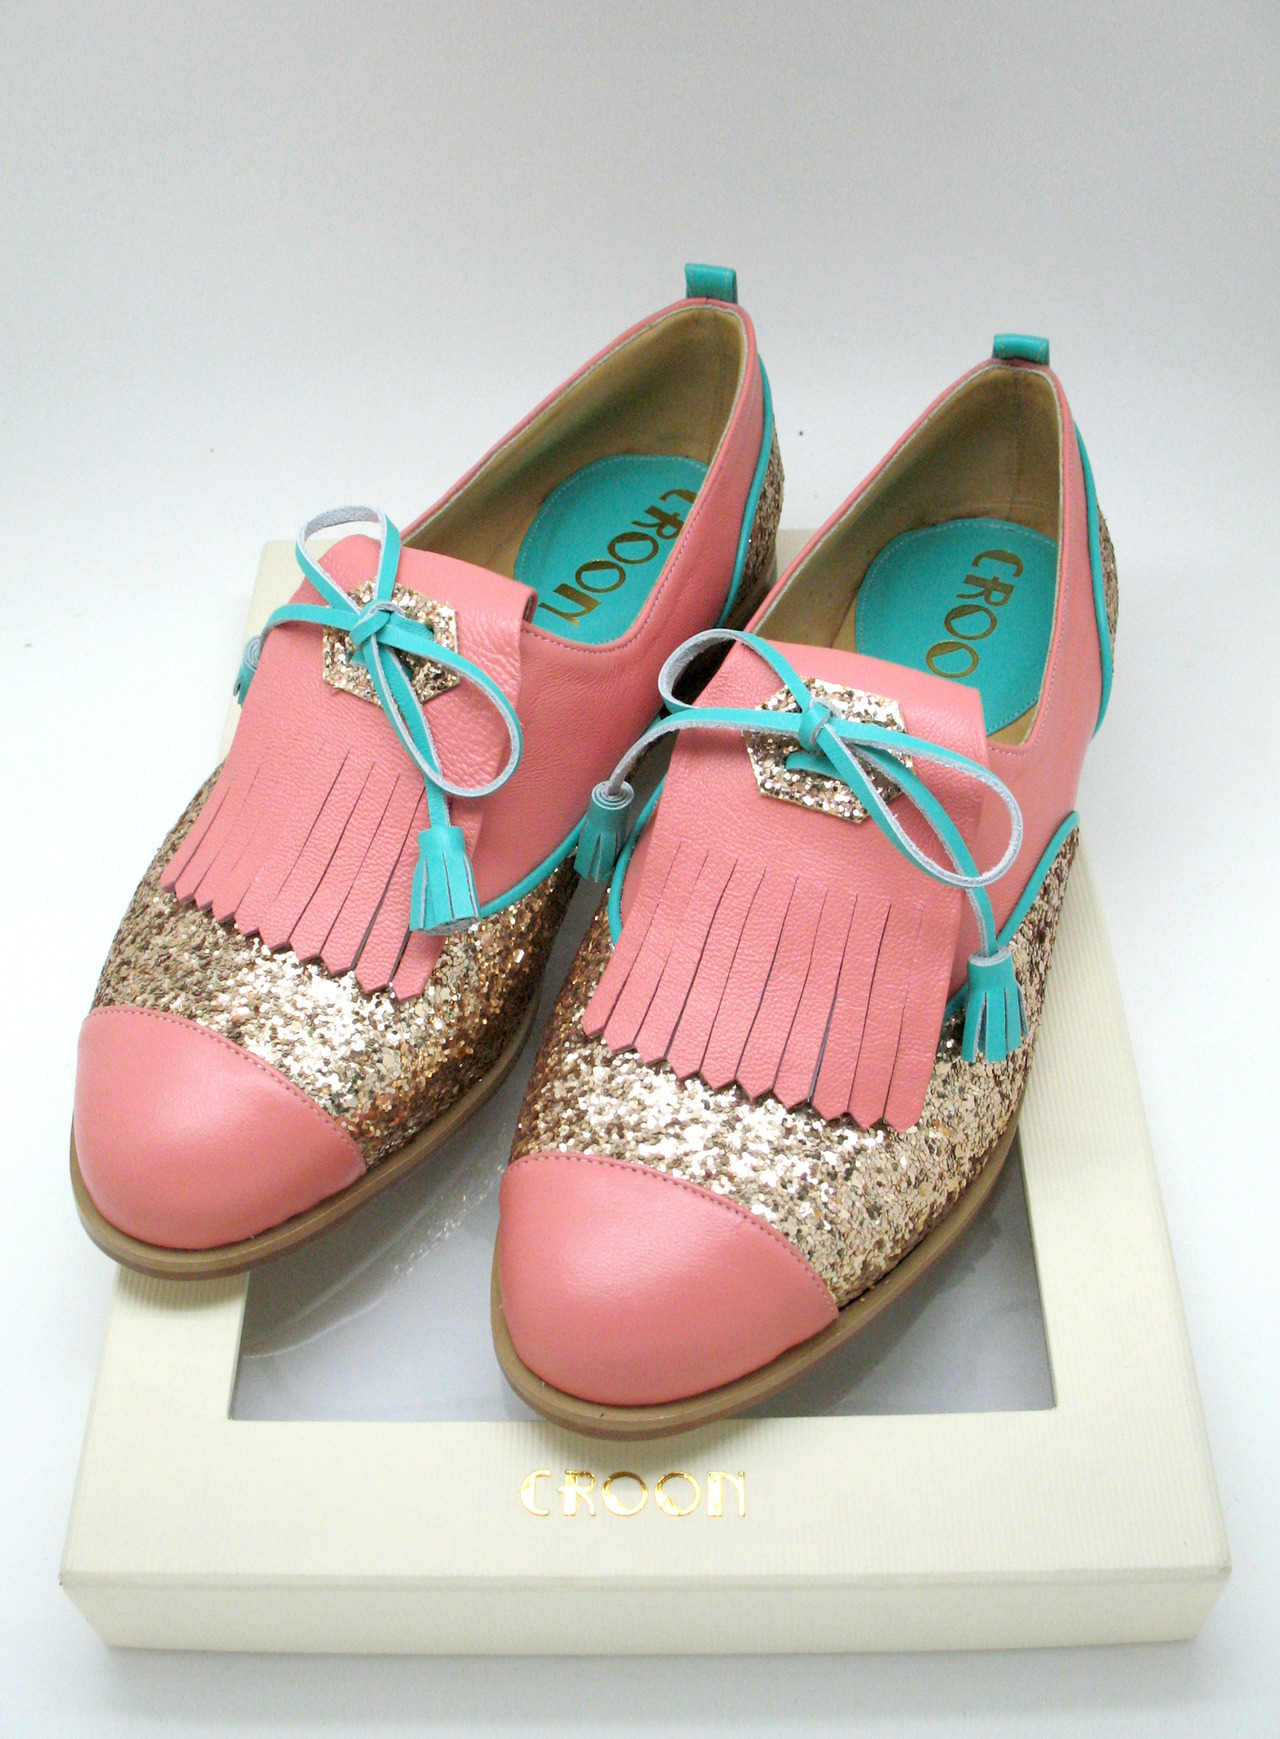
4. Can we all just take moment to imagine a world in which we could all afford and wear shoes as magical as this all the time? They're from Croon, exist in a range of painfully perfect colour combinations, and their very existence breaks my heart a little bit. 


5. Lastly, I'm liking this song, 'Nothing Arrived' by Villagers. Excellently catchy.

What little things have brightened your week? Do tell!

Sunday, July 22, 2012

DIY Triangle Patterns Tape Manicure

I had a lot of fun playing around with tape and nail polish this weekend, as you can see...
 My base is Sally Hansen 'Mint Sorbet', although the camera really changed the colour in this first photo. 
 Tip: I used a really tiny pair of sewing scissors, which made it way easier to cut smaller shapes out of the tape!
Allow the polish to dry a little before peeling off the tape. I had much better results that I usually do with tape manis by using a fairly old roll of masking tape that had a lost a bit of it's stick, so it came away quite easily without taking of the base colour or smudging the patterns as I peeled it off.


 I'm really loving triangle/geometric patterns at the moment!

homework

Sunday, July 8, 2012

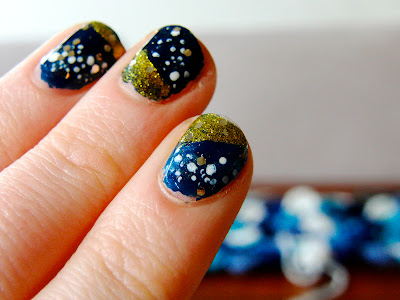
Gold Galaxy Nail Tutorial

Hello blog! I'm so sorry I've been neglecting you recently. I'm just struggling to find time between working endlessly and fitting in sleep and meals and other such things. And to make matters worse, my guest post went up on Yes, Teacher! yesterday! Which is in itself a very nice thing, and I have to thank Sarah for giving people the opportunity to contribute to her blog, and congratulate her on the birth of her baby boy William! However, it meant that a few more people visited my very neglected blog. Which again is a very nice thing, and super thanks to those who decided to follow along! However I feel kind of like I've had guests drop in and the house is a mess and I can't even offer them biscuits and tea. So my apologies! I'm desperately trying to get things cleaned up and back on track around here. So how about a quick nail tutorial? (alas, it's not even a very good nail tutorial. I'm falling apart at the seams here blog!)

So this is my attempt at a 'gold galaxy' manicure. There are plenty of galaxy nail tutorials out there that are far, far better than this one, but I mainly wanted to experiment with the gold. I'm not really happy with how the actual 'galaxy' part turned out, but it was my first attempt so I can definitely work at it more for next time. So maybe think of this more as ideas and inspiration than a proper tutorial!

I'm using a bunch of colours I picked up from Sportsgirl, which is what inspired to try this out in the first place. I mean, have you ever seen a gold so shiny?! So here we have Sportsgirl 'All That Glitters', 'Debut', 'Denim', a shimmery blue that I've had for years, and Sally Hansen 'White On'. I also used a make-up sponge and a skewer for dotting. 

 First off, I painted all my nails in two coats of dark blue and allowed them to try enough to put the tape on. 
I put the tape across at varying angles, and did two coats of gold. Fortunately this gold is pretty strong and showed up reasonably well over the blue, but I guess it might have been better to do blue over gold. But it always gets complicated and messy with tape manis!...which is probably because I'm super novice, but oh well.
 Next, I sponged a little of the shimmery, lighter blue in a wide, diagonal line across the nail, to add a bit of depth to the galaxy look. This is where I think I went wrong in achieving a really good galaxy look, as I was afraid the sponging was going to ruin it so I really held back. However, most of the tutorials I've seen really sponge a lot of lighter colour on there, so if I did it again, I'd certainly sponge more and maybe try and blend with the darker blue. 
 I then used the skewer to create 'stars' of various sizes...


 And finished off with a goat of 'All That Glitters'. Again, I think if I tried this again, I would use a coat of really fine gold glitter, as I think the dots of big glitter here compete with the stars. 
I must also apologise for the fact that by the time I had time/day light to properly photograph my nails, they'd chipped a little.


 So there we have it, a super novice, super messy manicure, that might hopefully give someone out there some inspiration. Let me know if it does!

Wednesday, March 21, 2012

Hunger Games 'Girl on Fire' Nail Tutorial

As I've said before, I'm a bit of a massive nerd. So, I thought I'd combine two of my loves, being a nerd and painting my nails, in honour of the release of the Hunger Games movie (going to a midnight screening tonight. Excited!) Here is my tutorial for Katniss Everdeen inspired 'Girl on Fire' ombre nails!
 Step 1: Gather your nail polish. You will need a black (to represent the black coal of District 12) and a few reds/oranges to create the gradient (I also have a yellow here, which I will explain as we go), and if you like, a glitter to finish and tie it all together.
You will also need a make up sponge, cute into small pieces, and a pair of tweezers. This is used to gently daub the colour onto yours nails, and blend the colours to create the ombre effect.
 Step 2: Paint all your nails black, using your favourite black nail polish. Allow to dry.

 Step 3: Using the tweezers and small piece of sponge, gently sponge on some red polish, about 1/3 of the way up your nail. I would then recommend sponging a little more black at the base of the red, then perhaps layering this with a little more red, as this helps to create a real blended look. For a great example of what I mean (it's difficult to explain without demonstrating!) check out this excellent video from Pixie Polish that demonstrates fantastic blending.


Step 4: Blend in your next colour. I originally planned to just blend straight from red to orange, but I found that the orange wasn't quite strong enough to show up on the black. This is where the yellow came in handy. I added a little yellow along the top of my nail, then layered the orange over this and it brought out the orange colour a lot more, and also created more of a gradient. Then blend the orange and red together, about halfway up your nail, like you did the red and black. 
Some examples of my blending process.

 Step 5: Coat with glitter, and finish with a top coat and you're done! I decided to use a large, gold glitter here, to represent Katiniss' gold mockingjay pin. However I wasn't 100% sold on the look of the glitter, so did the other hand without it to compare. What do you think? Glitter or no? I'd love to know if anyone else out there is a Hunger Games fan, and if you try this, or some variation of this :) Once again, sorry if my instructions are unclear, I'm a bit of a newbie at writing tutorials!
 Now, go out there and show the Capitol what you're made of!


homework